Introduction
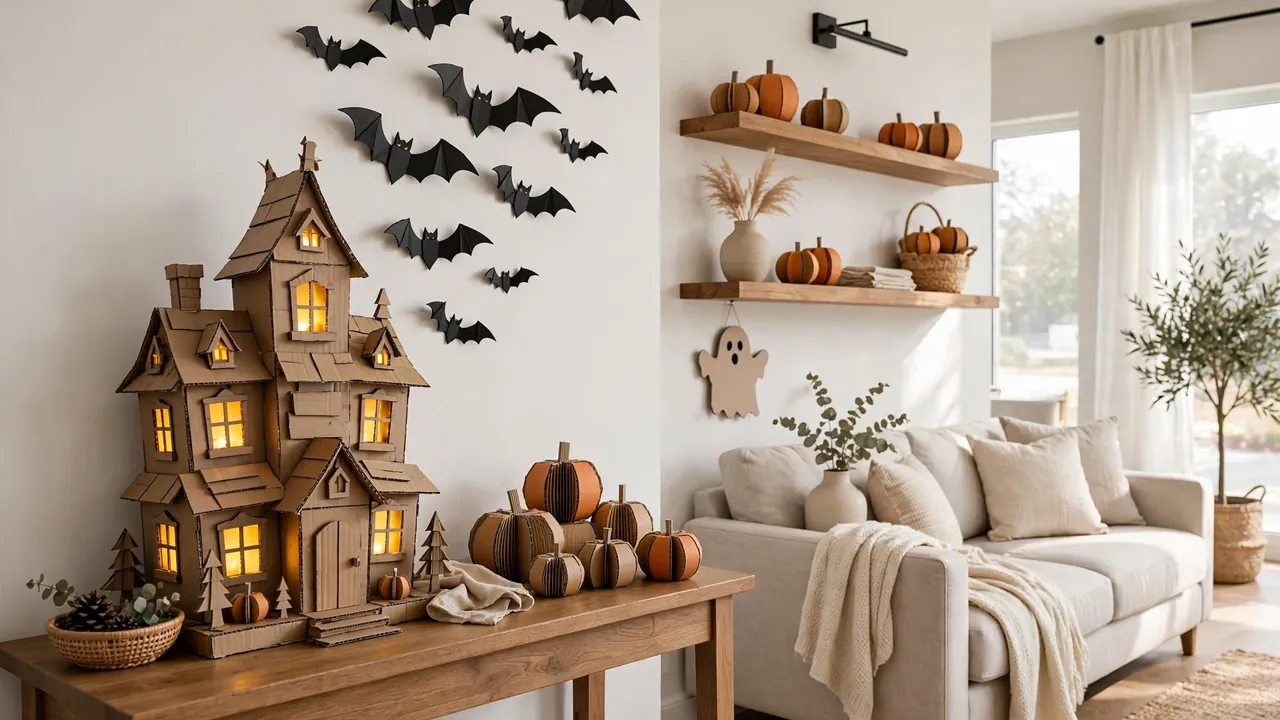
Last October I was staring at a stack of moving boxes in my garage and thinking about how much Halloween stuff costs at the store. My kids wanted a spooky house, my wallet wanted me to stay home, and those boxes were just sitting there. So I grabbed a box cutter, some black paint, and a free afternoon, and we made our first cardboard haunted house. It looked a little crooked, but the kids loved it more than anything we had bought before. That is the thing about diy cardboard halloween decorations. They cost almost nothing, they keep little hands busy, and they give your home a handmade feel that store bought plastic just cannot copy. These 23 cardboard halloween crafts are simple enough to finish in one sitting, and each one works in a real room, from the front porch to the living room mantel.
1. Cardboard Haunted House
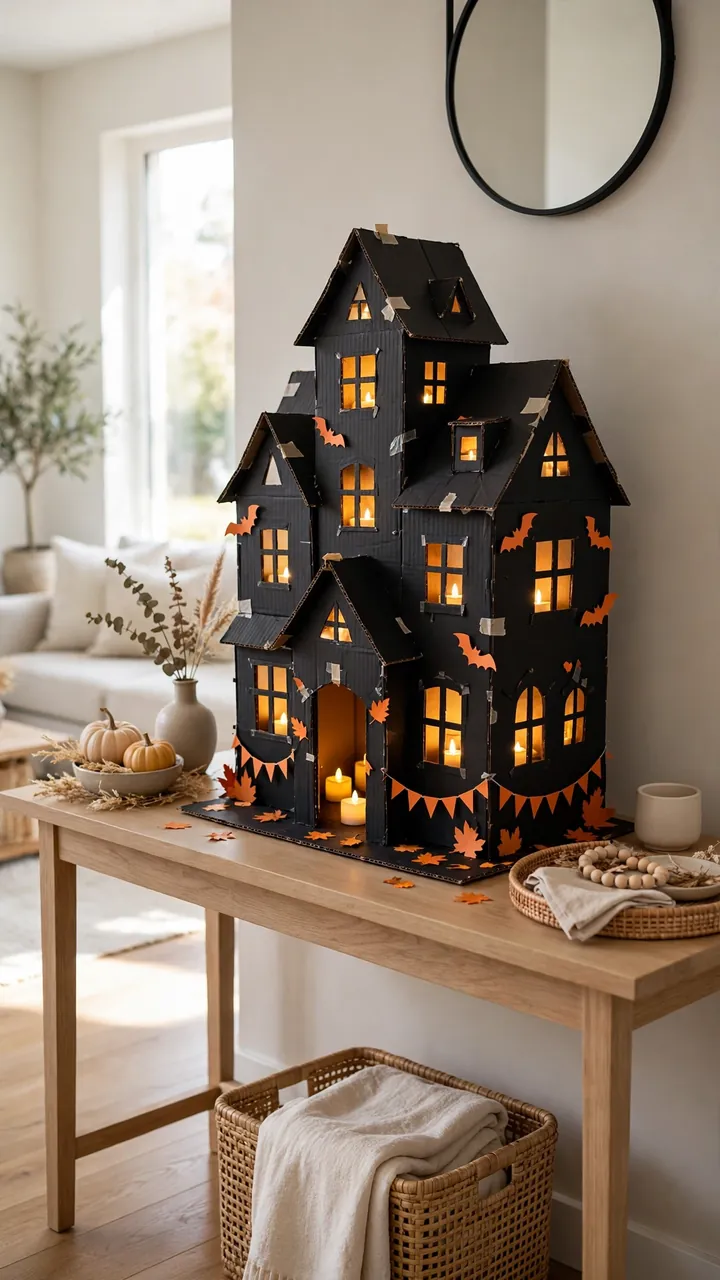
Cut a large box into a tall haunted house shape with a pointed roof, crooked windows, and a little door, then paint it black or dark gray. This spooky cardboard decor looks best on an entryway table or a low shelf where guests see it right away. Use a box cutter for the window holes, and place small battery tea lights behind the house so the windows glow at night. Add details with white or orange paint, like shutters, cracks, and a tiny fence made from thin cardboard strips. A practical tip is to trace your shapes with a pencil first, since cardboard is hard to fix once you cut it. Keep the paint layers thin so the box does not get soggy. You can finish this halloween cardboard cutout in about an hour, and it folds flat for storage when the season ends. Set it near a bowl of candy or a small pumpkin so the whole entryway feels pulled together. If the edges curl, press them under a heavy book overnight and they will sit flat again.
2. Spooky Cardboard Ghosts
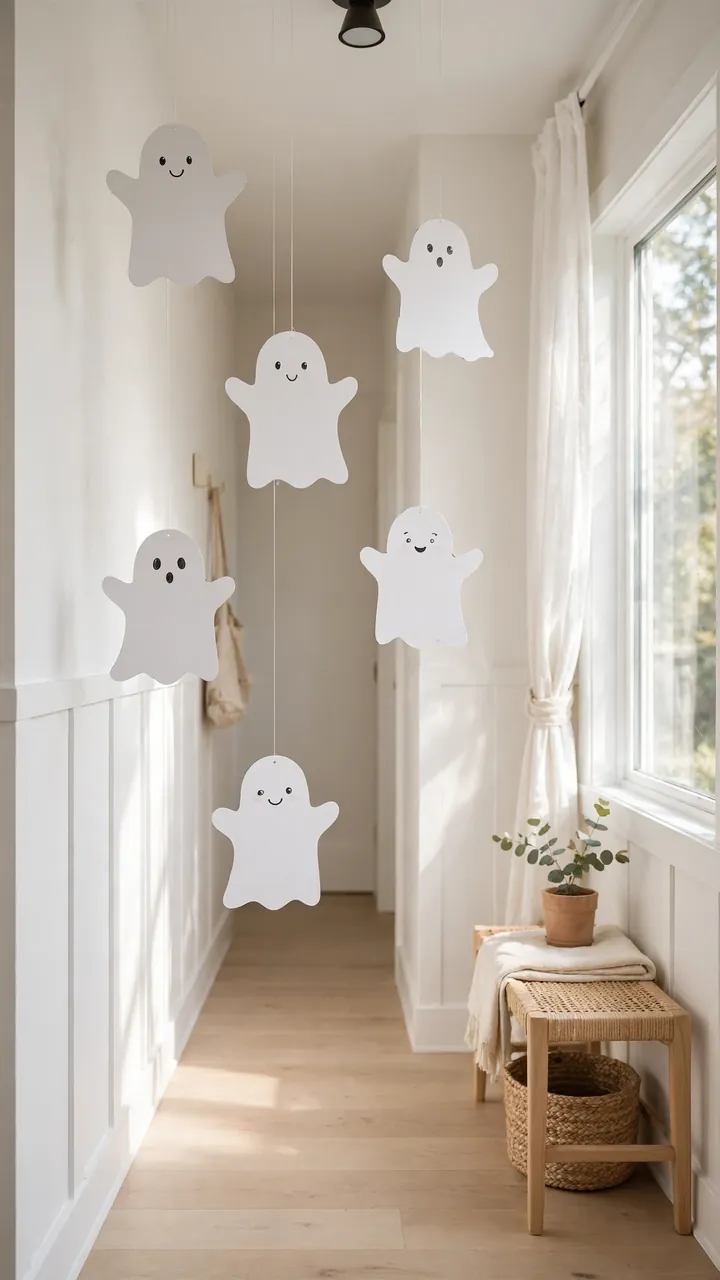
Cut simple ghost shapes from white painted cardboard, with rounded heads and wavy bottoms, and give each one a friendly or scared face in black marker. These cardboard ghost decorations are perfect for hanging in a hallway or across a living room wall where they can float at different heights. Use thin cardboard from cereal boxes so the ghosts are light enough to hang with tape or string. Layer two pieces together if you want them stiffer. To make them look nicer, paint the edges softly and add a little pink on the cheeks for a cute touch. Hang them with clear fishing line from the ceiling so they sway gently. This is one of the easiest easy halloween diy decor projects for kids, and you can make a whole family of ghosts in under thirty minutes. Try making some ghosts with happy faces and some with spooky faces for variety. Tuck a few into a potted plant or hang them low where toddlers can see them.
3. Cardboard Pumpkin Lanterns
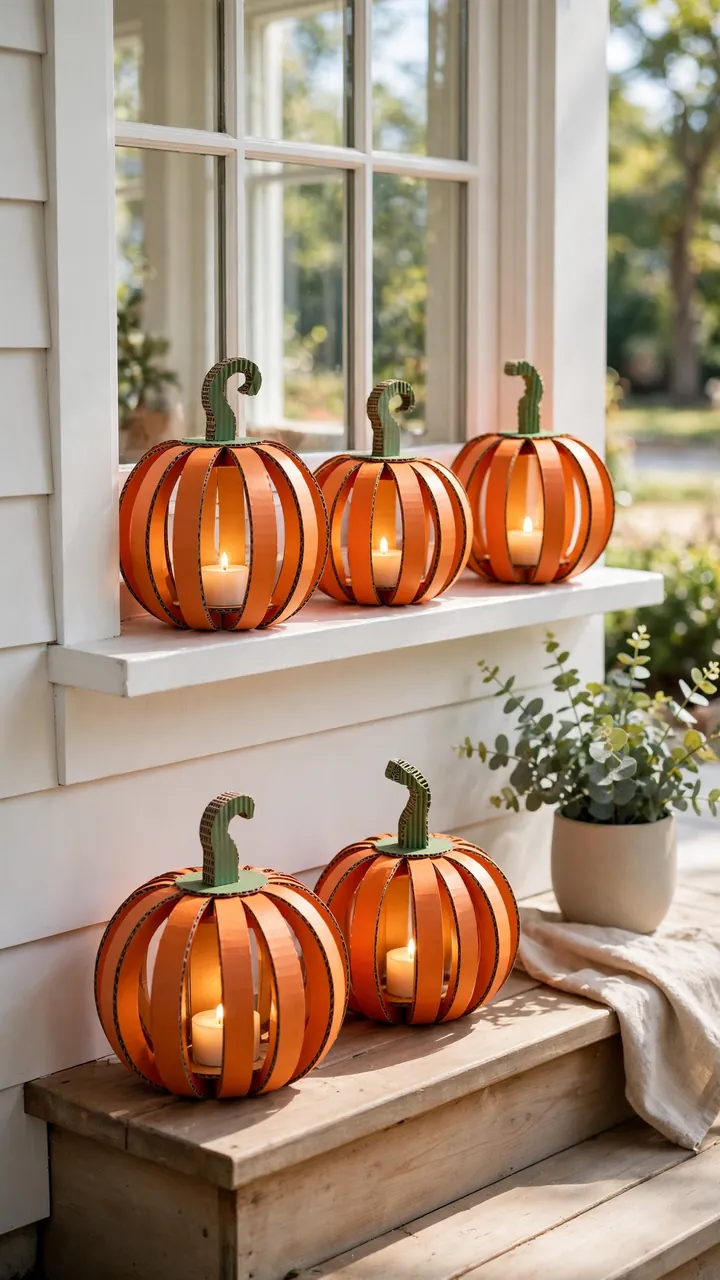
Build round pumpkin lanterns by cutting curved strips from cardboard and joining them into a ball shape, then paint them bright orange. These cardboard pumpkin crafts glow nicely on a porch step or a windowsill in the evening. Cut about eight identical curved strips, punch a small hole at the top and bottom of each, and join them with a brad or a twist tie. Paint the outside orange and add a green cardboard stem on top. Place a battery candle inside each pumpkin so the light shines through the gaps. A good tip is to keep the strips the same width so the pumpkin looks even. These lanterns are light, cheap, and safe around kids and pets, and they look great grouped in threes. Set them on different steps so the heights vary, which looks more natural. If a strip bends out of shape, just reshape it gently by hand before the paint fully dries.
4. Creepy Window Silhouettes
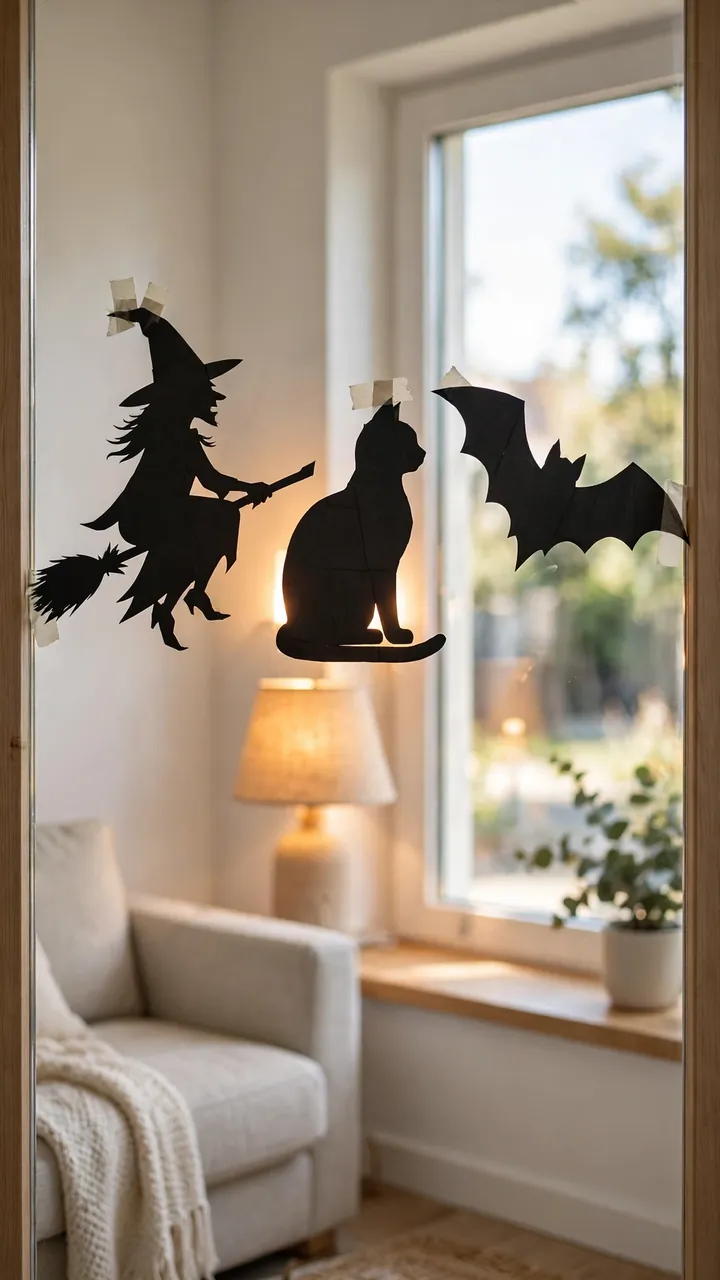
Cut black cardboard into spooky shapes like witches, cats, bats, and bare trees, and tape them inside your windows facing out. This haunted house decoration idea makes your whole home look creepy from the street after dark. Use thin black poster board or cardboard painted black, and cut the shapes with sharp scissors or a craft knife. Tape them flat against the glass so the edges look clean. When you turn on a lamp behind the window, the shapes show up as dark shadows. Keep the designs simple, since bold shapes read better from far away. You can draw your shapes on paper first and trace them onto the cardboard. This project costs almost nothing and takes one afternoon for the whole house. Start with the front windows since those get the most attention from the street. Save your templates in an envelope so you can reuse the same shapes next year without redrawing them.
5. Cardboard Witch Hats
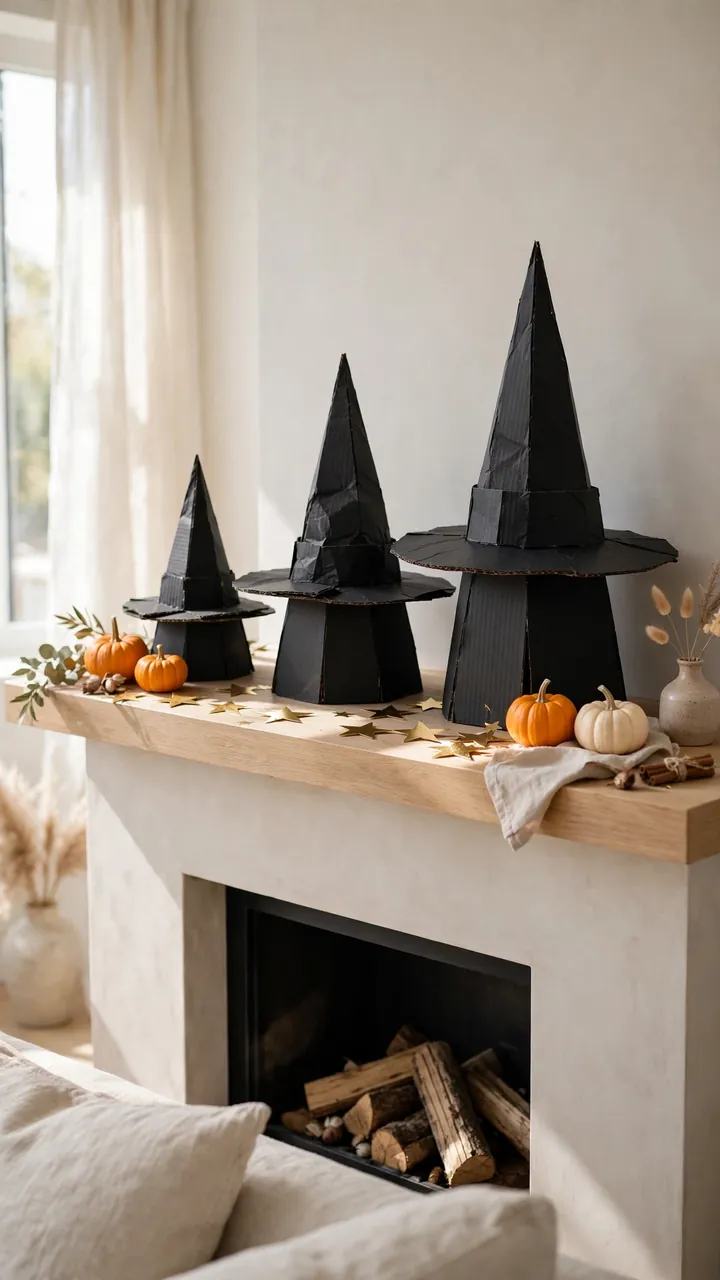
Make tall witch hats from cardboard cones and wide flat brims, then paint them black and add a paper band in orange or purple. These paper cutout halloween art pieces look cute on a mantel, a bookshelf, or as part of a table centerpiece. Roll a large triangle of thin cardboard into a cone and glue the edge, then cut a circle with a hole in the middle for the brim. Let the cone bend a little at the top for that classic floppy witch look. Add stars or moons cut from gold paper for extra charm. A handy tip is to use hot glue to hold the cone shape while it dries. Make three hats in different sizes and group them together with a small pumpkin for a sweet fall display. Tuck a few dried leaves or pinecones around the base to fill out the scene. These hats also work as fun party hats if you cut them a little larger.
6. Tombstone Mantel Display
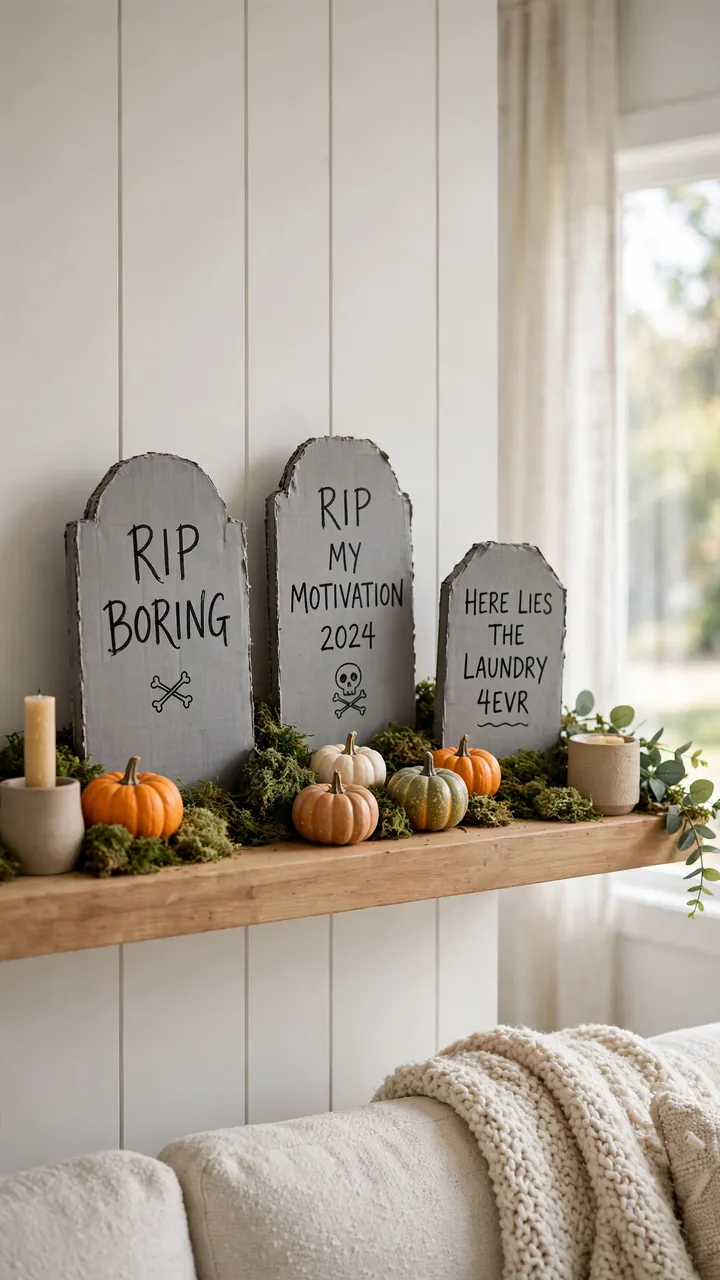
Cut tombstone shapes from thick cardboard, paint them gray, and write funny sayings on them with a black marker. This recycled cardboard craft is perfect for a living room mantel or a shelf where you want a graveyard feel without anything scary for little kids. Cut the tops into rounded or pointed shapes, and glue a small base to the back so each stone stands up on its own. Sponge on darker gray paint to make them look like old stone. Write names like RIP or Here Lies Fred with a steady hand, and keep the letters big so they read from across the room. Lean a few stones at slight angles for a natural look. Add fake moss or small pumpkins around the base to finish the scene. If you want them sturdier, glue a second layer of cardboard to the back before painting. A string of small orange lights woven between the stones makes the mantel glow at night.
7. Cardboard Bat Garland
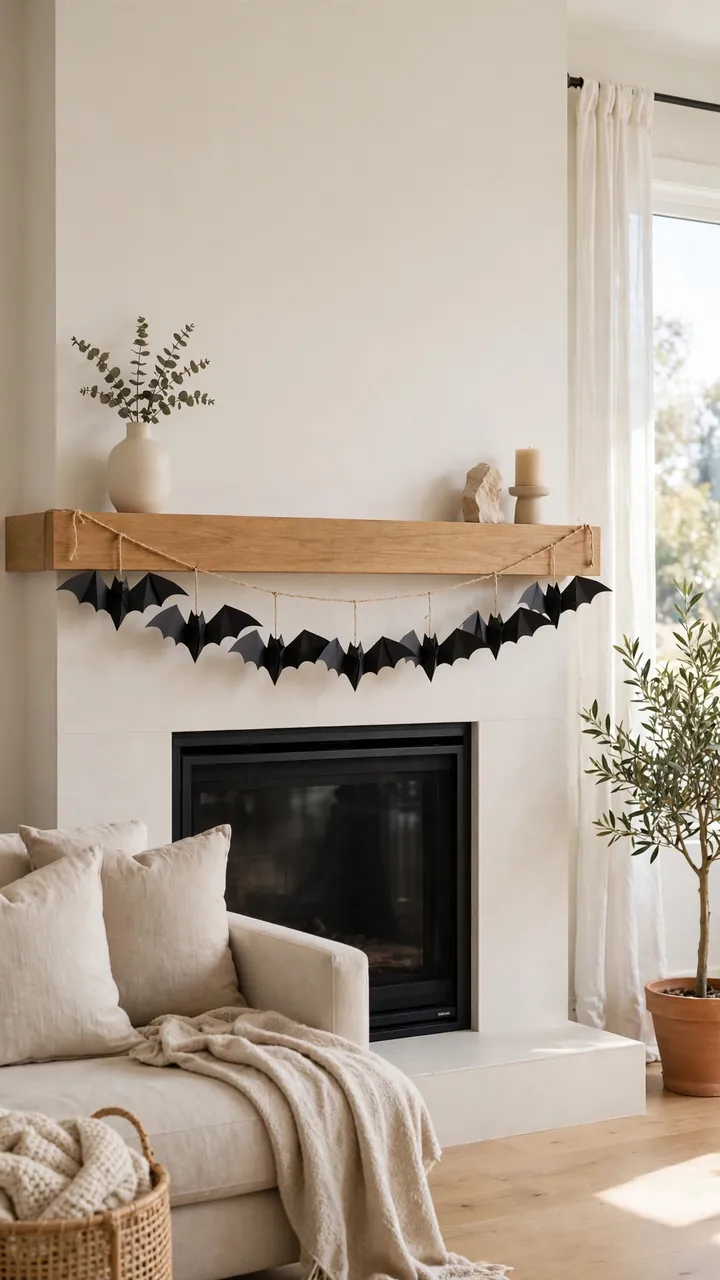
Cut dozens of small bat shapes from black cardboard and string them on twine to make a long garland. This spooky cardboard decor works beautifully across a fireplace, a doorway, or a bedroom wall. Fold each bat in the middle slightly so the wings look like they are flying. Use a simple bat template from a printed drawing or draw your own with two wing curves. Punch a tiny hole near the top of each bat and thread them onto the string, spacing them a few inches apart. A good tip is to cut several bats at once by stacking three or four sheets of thin cardboard. Hang the garland with small removable hooks so you do not damage your walls. It takes about an hour and looks great. Drape a second shorter garland below the first for a fuller look. You can also add tiny orange paper dots between the bats to look like falling leaves.
8. Spooky Door Monster
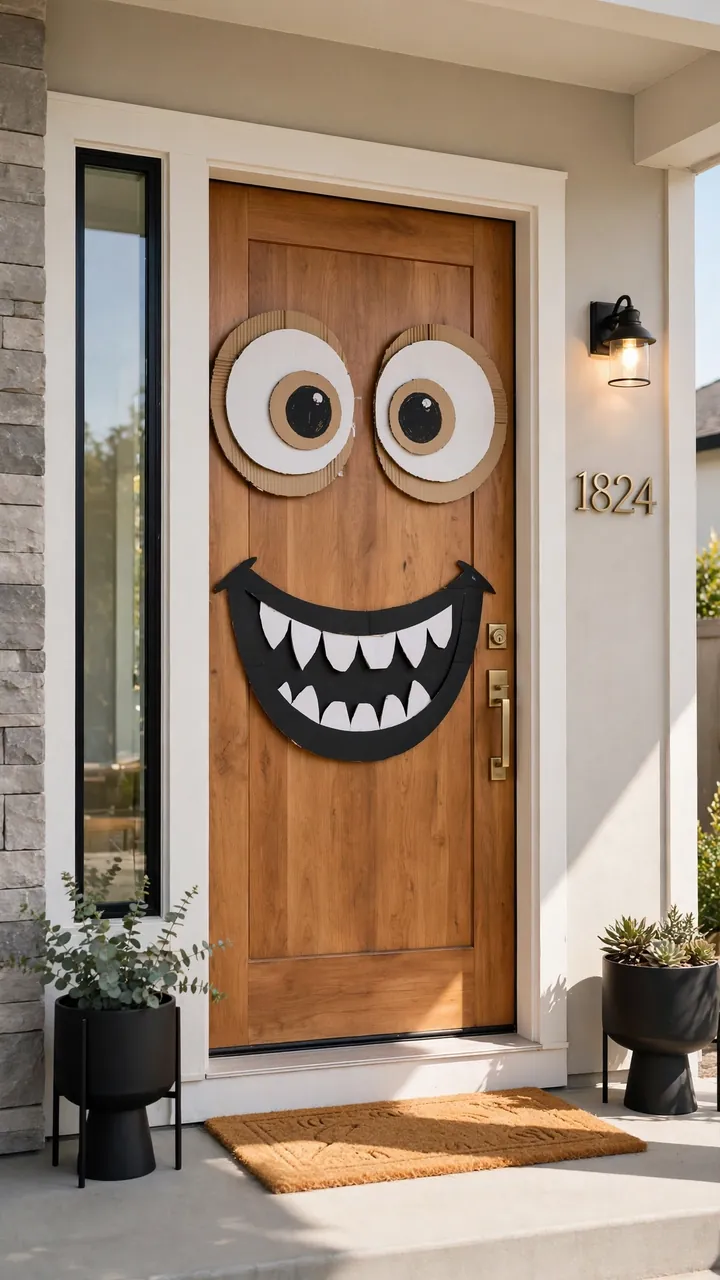
Turn your front door into a friendly monster face using large cardboard cutouts for eyes, teeth, and eyebrows. This halloween porch decor idea makes guests smile before they even knock. Cut two big white circles for eyes with black pupils, and a wide mouth shape from black cardboard with white triangle teeth glued on. Use painter tape on the back of each piece so the paint on your door stays safe. Place the eyes high and the mouth low to make the face look big and silly. Add cardboard eyebrows tilted at an angle for extra personality. This is a fun project to do with kids in one afternoon, and everything peels off easily after Halloween. Take a photo at night with the porch light on. Add a cardboard tongue or rosy cheeks to make the monster extra friendly for younger trick or treaters. Keep a few extra teeth cutouts handy in case one curls or tears during the night.
9. Cardboard Spider Webs
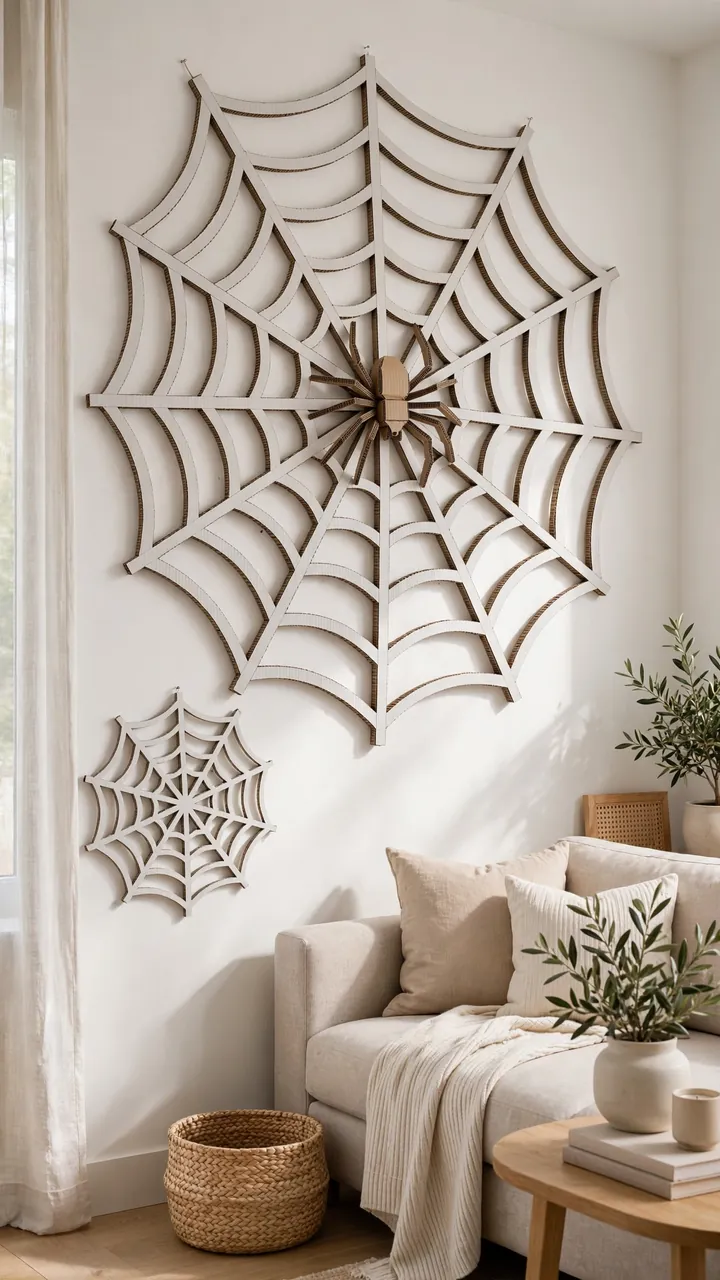
Cut large spider webs from white or gray cardboard by drawing circles and connecting lines, then cutting out the spaces between. These halloween cardboard cutouts look great in corners, over doorways, or behind a sofa. Draw your web on the cardboard with a pencil, starting with straight lines from the center and adding curved lines between them. Cut carefully with a craft knife on a safe surface. Make one big web as a focal point and two smaller ones to go with it. Add a cardboard spider with long legs in the middle of the largest web. Hang them with small nails or tape. A tip is to keep the lines thick enough that the web does not tear. Spray a little fake webbing over them for extra texture. Tuck a small battery candle nearby so the web casts soft shadows on the wall at night. Store the webs flat between sheets of paper so they keep their shape.
10. Mini Cardboard Village
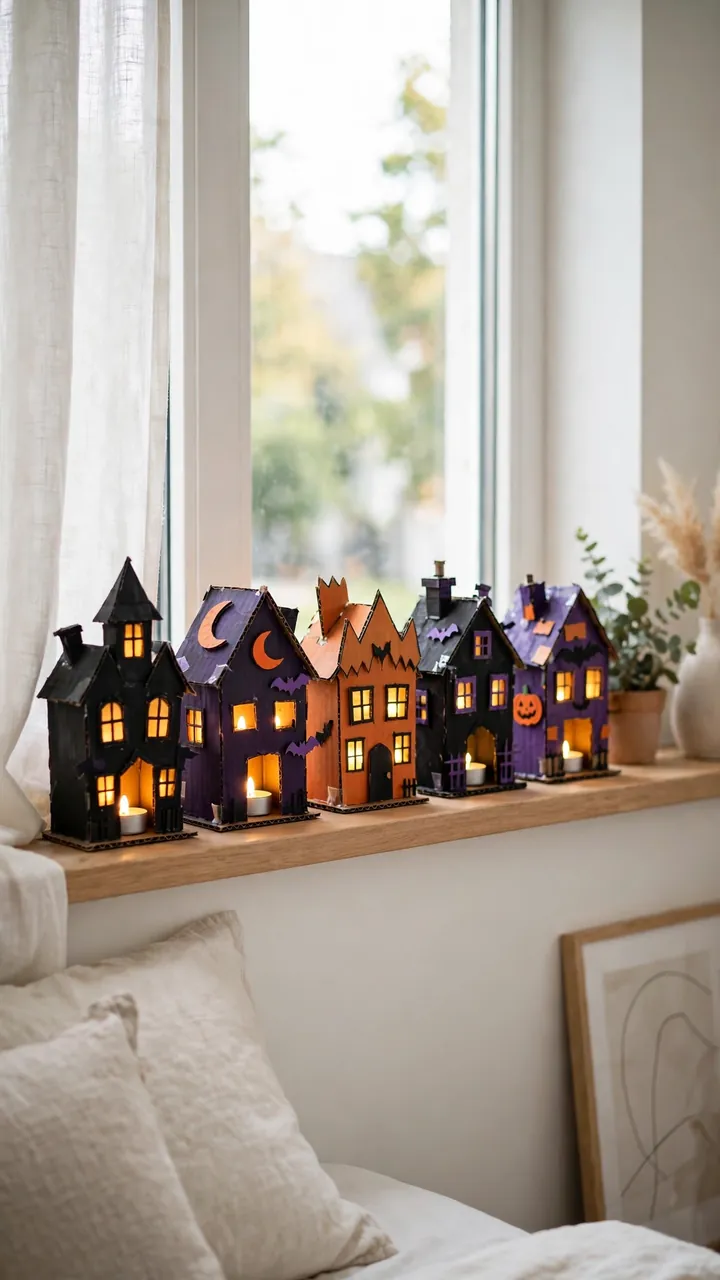
Build a row of tiny haunted houses from small boxes and cardboard scraps, each with cut out windows and doors. This haunted house decoration looks sweet on a windowsill, a side table, or a bedroom dresser. Use small shipping boxes, tissue boxes, or food boxes as the base for each house. Cut out windows and doors, paint the houses in dark colors like black, purple, and deep orange, and add paper roofs. Put a battery tea light inside each one so the whole village glows at night. Vary the heights and shapes so the row looks like a real street. This is a nice evening project, and kids love deciding which house gets which color. Line them up close together for the best effect. Sprinkle a little fake snow or cotton around the base to look like fog. Turn the lights on at dusk and the whole row glows like a real haunted street.
11. Cardboard Coffin Shelf
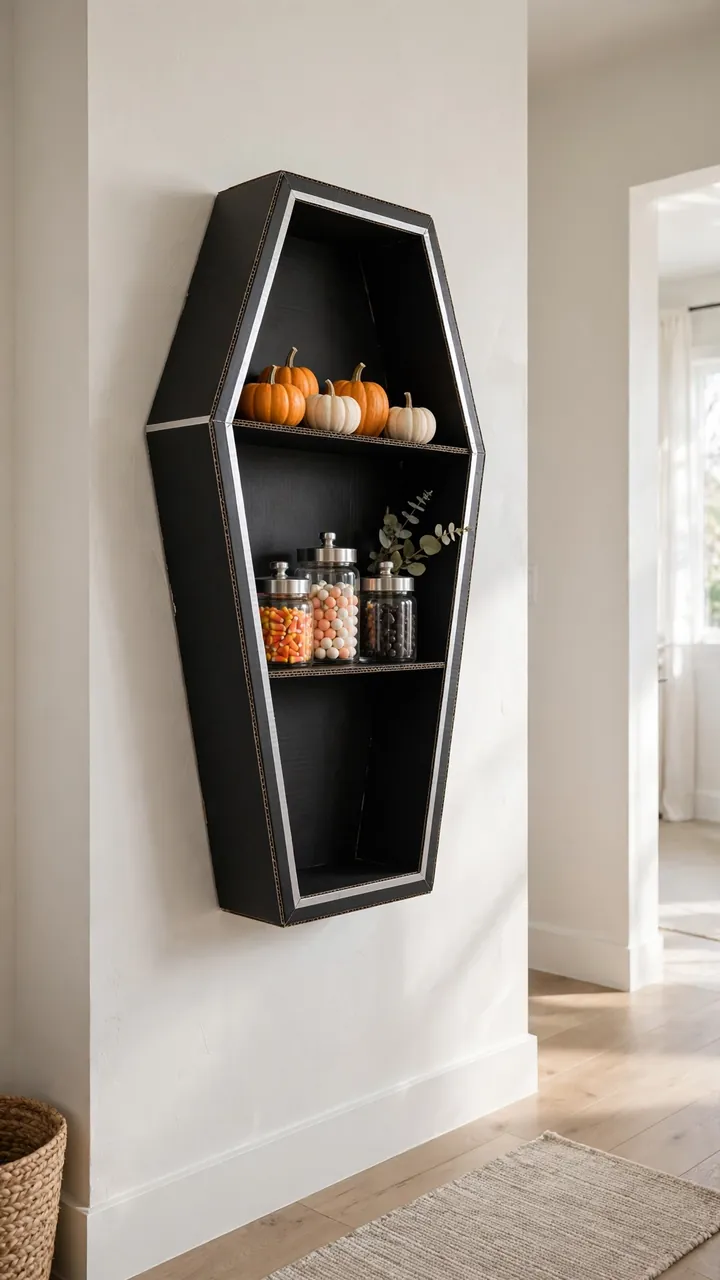
Make a coffin shaped shelf from cardboard by cutting two coffin outlines and joining them with side strips. This spooky cardboard decor is fun in a hallway or a teen bedroom for holding small Halloween trinkets. Cut the classic six sided coffin shape twice for the front and back, then cut long strips for the sides and glue everything together. Paint it black inside and out, and add silver trim with a paint pen for a fancy look. Keep the shelf shallow so it hangs flat against the wall. Use strong glue and let it dry fully before adding items. Place small pumpkins, candles, or candy jars on the shelves. Hang it with two sturdy hooks and check that it sits level before you walk away. A small spider or bat cutout glued to the lid adds a playful finishing touch. A tip is to reinforce the corners with extra cardboard triangles so the shelf holds its shape.
12. Ghostly Fireplace Screen
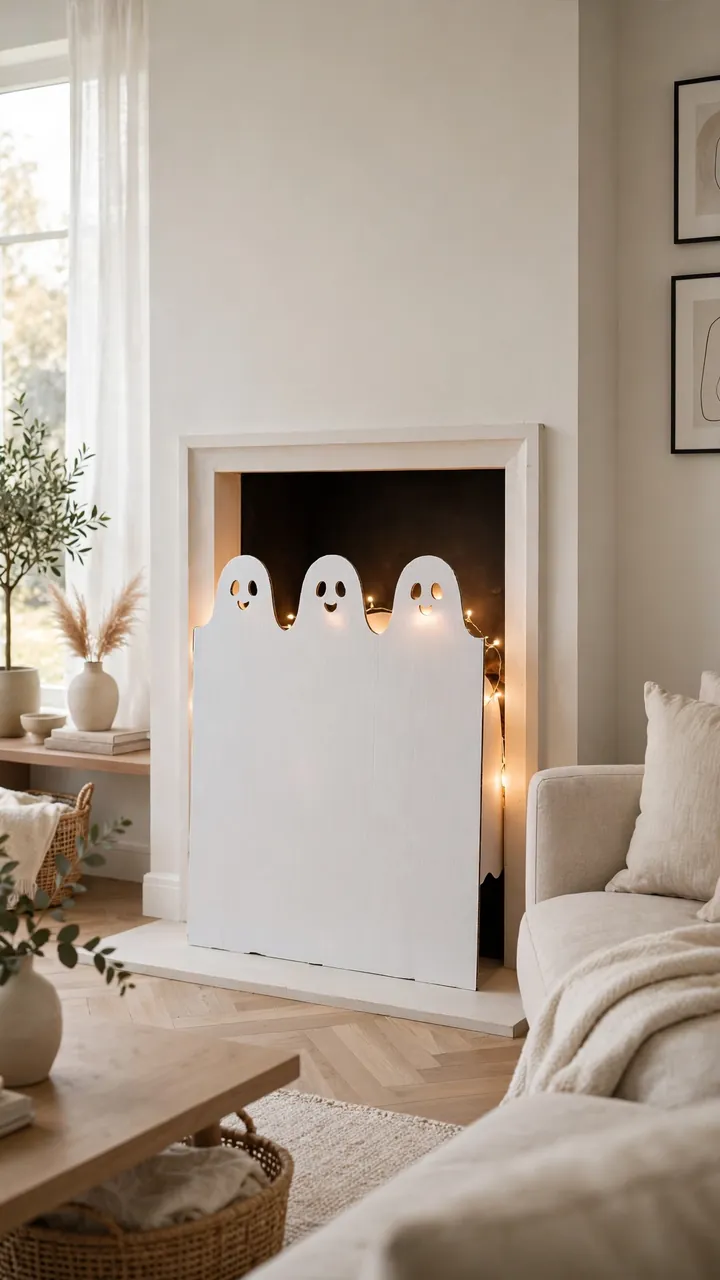
Create a fireplace screen from a large piece of cardboard cut into ghost or pumpkin shapes that stands in front of your fireplace. This easy halloween diy decor adds a festive touch to the living room without a real fire. Cut the cardboard to fit your fireplace opening, then cut out ghost shapes along the top edge so it looks like a row of ghosts. Paint it white or orange and add simple faces. Fold the sides back slightly so it stands on its own. If you do not use your fireplace, this screen hides the dark opening nicely. A practical tip is to measure your fireplace first and cut the cardboard a little larger so it fits snugly. Add battery lights behind it for a soft glow in the evening. Pair it with a couple of pumpkins on the hearth to complete the look. When the season ends, it slides right out and stores flat.
13. Cardboard Owl Perch

Cut a large owl shape from cardboard, paint it brown and orange, and perch it on a branch or a shelf. These cardboard halloween crafts bring a woodland spooky feel to a living room corner or a bookshelf. Draw the owl with big round eyes, feather lines, and sharp talons, then cut it out carefully. Paint the body brown, add lighter feather marks, and give the eyes big yellow circles with black pupils. Glue the owl to a sturdy base or lean it against books. Cut a branch shape from cardboard and paint it dark brown for the owl to sit on. A good tip is to layer two pieces of cardboard for the body so it stands up straight. Kids love helping paint the feathers. Set the owl near a stack of books or a small pumpkin so it looks like part of a styled shelf. A few yellow leaves tucked around the base make it feel like fall.
14. Witch Boot Planters
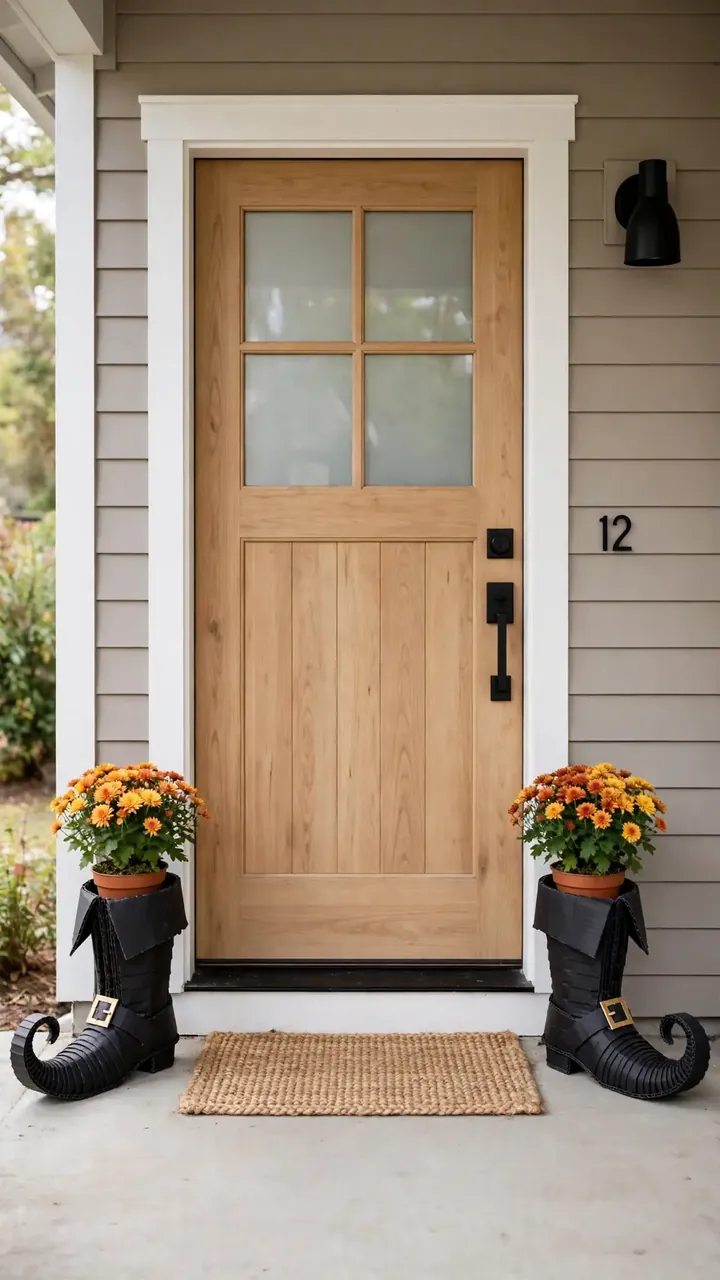
Shape cardboard into tall witch boots with pointed curled toes, paint them black or purple, and use them as planters for small fall plants. This recycled cardboard craft looks adorable on porch steps or a kitchen windowsill. Cut two boot shapes for the sides, plus strips for the front, back, and sole, and glue them into a boot form. Curl the toe by bending damp cardboard gently and letting it dry. Line the inside with a plastic bag before adding a small potted mum or a faux plant. Paint the boots black and add a gold buckle cut from yellow paper. A tip is to keep the boots small so they do not tip over. They make a fun pair flanking your front door. Add a small broom or a tiny pumpkin beside each boot to build a little witchy scene. If the cardboard gets damp outside, bring them in overnight to keep them crisp.
15. Cardboard Skull Wall
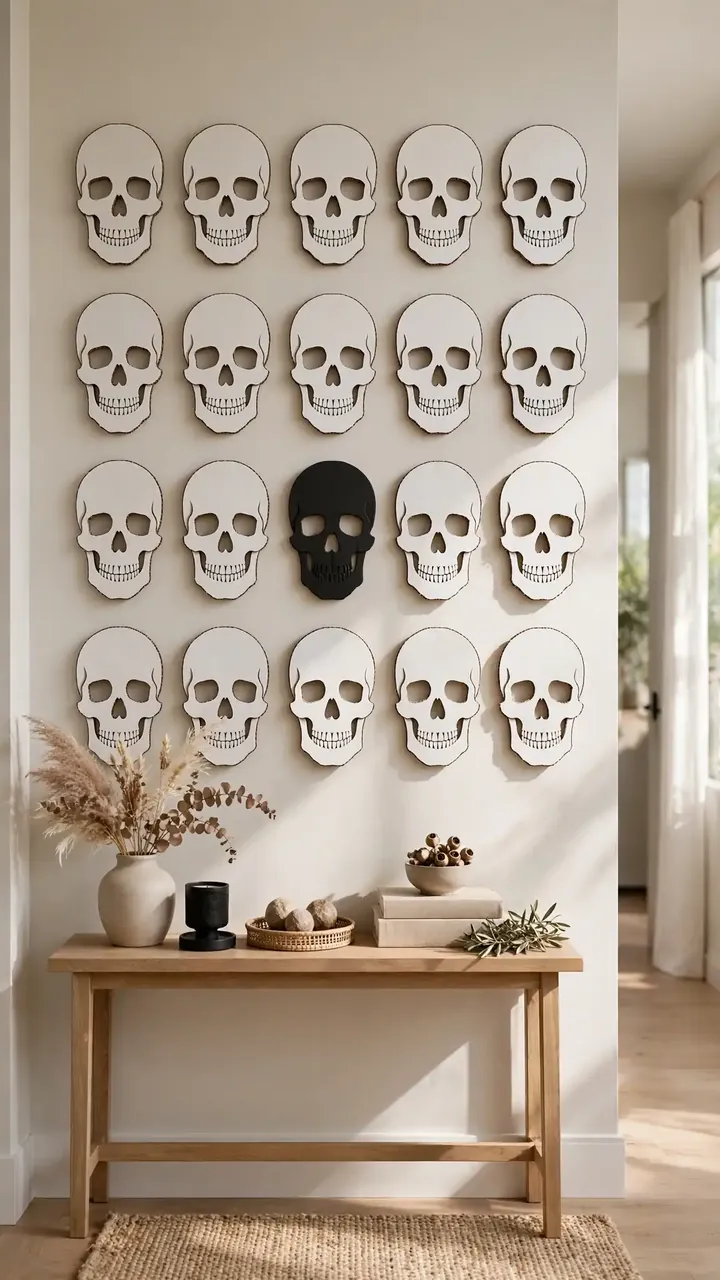
Cut large skull shapes from white cardboard and arrange them in a grid on a living room or hallway wall. This spooky cardboard decor makes a bold statement without being too gory. Draw a simple skull with round eyes, a nose triangle, and teeth lines, then trace it to make five or six matching skulls. Paint them white and shade the edges lightly with gray for depth. Space them evenly on the wall using small tape loops on the back. Mix in one or two skulls painted black for contrast. A handy tip is to cut the skulls from sturdy cardboard so the edges stay crisp. This display photographs well and takes less than two hours from start to finish. Mix the sizes slightly so the grid does not look too perfect. A warm lamp nearby softens the look and keeps it stylish instead of scary. If you run short on time, even three large skulls in a row make a strong display.
16. Haunted Mirror Frame
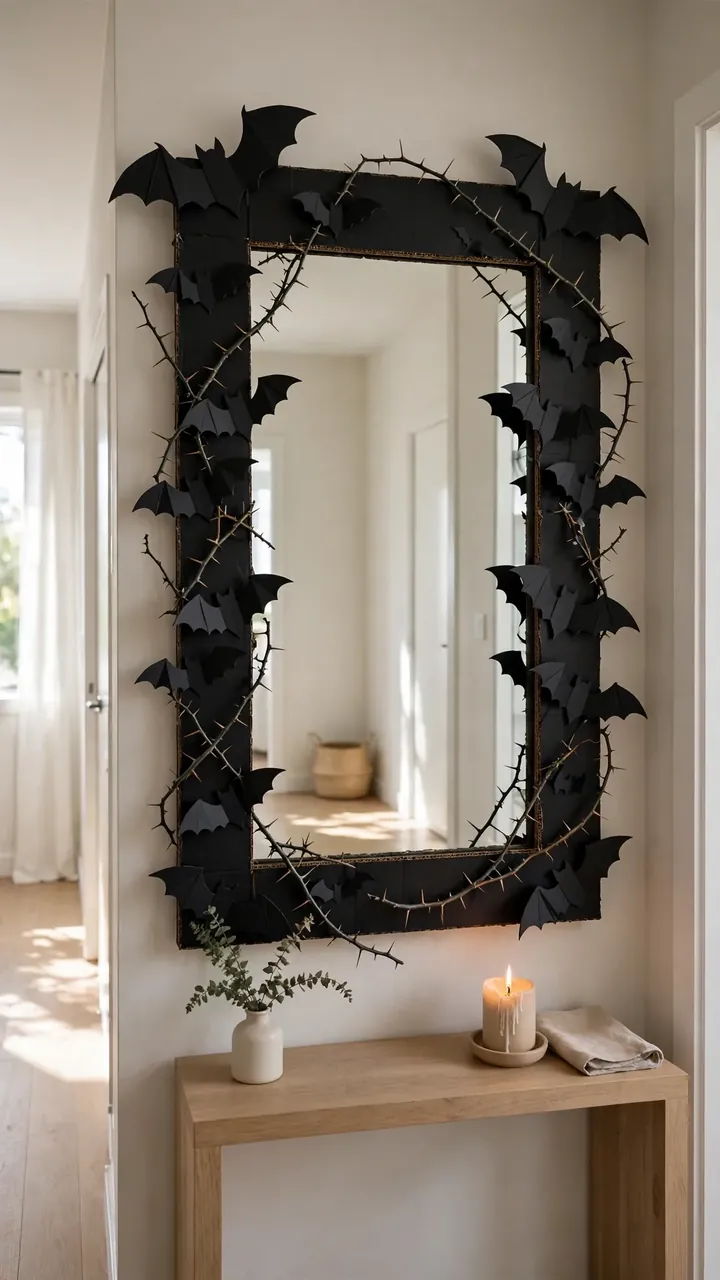
Build a chunky haunted frame from cardboard strips around a mirror or a picture frame, with bats, thorns, and spider shapes attached. This halloween cardboard cutout idea turns a plain hallway mirror into a spooky focal point. Cut wide strips of cardboard and glue them around the existing frame to make it thicker, then paint everything black. Cut small bats, moons, and thorn shapes and glue them onto the frame at angles. Keep the decorations away from the mirror surface so it still reflects clearly. A good tip is to build the frame pieces on the table first, then attach them as one unit. Use removable strips to hold it in place if you are decorating a rented home. It looks great with a candle nearby. Add a couple of small cardboard moons at the top corners for balance. Step back often while you glue so the decorations stay even on both sides.
17. Cardboard Candy Bowl

Make a pumpkin or monster shaped candy bowl from cardboard by forming a wide bowl shape and painting it festive colors. This cardboard pumpkin craft is perfect for the entryway table on Halloween night. Cut a large circle for the base and long curved strips for the sides, then glue the strips around the base and join them at the top rim. Paint the outside orange with a jack o lantern face, or green with monster eyes. Line the inside with orange tissue paper before adding wrapped candy. A practical tip is to double layer the base so it holds the weight of the candy. Keep the bowl low and wide so little hands can reach in easily. It is sturdy enough for one big night of trick or treaters. Set it on a tray in case a few candy wrappers slip through, and refill it early in the evening.
18. Spooky Staircase Cutouts
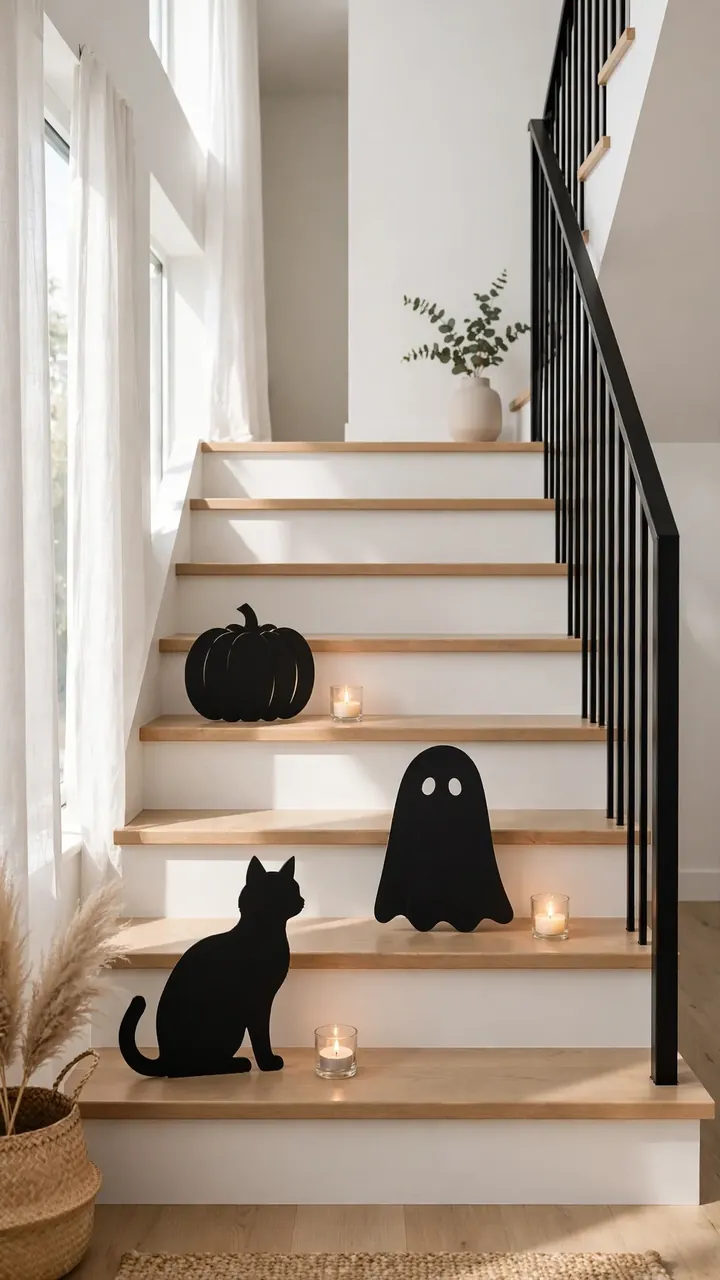
Cut black cat, ghost, and pumpkin silhouettes from cardboard and line them along your staircase steps. This halloween porch decor style idea works indoors too, and it makes the stairs feel festive every time you walk up. Cut each shape from thin black or orange cardboard and attach a folded base so they stand on their own. Place them on alternating steps so the display flows upward. Vary the sizes, with bigger shapes at the bottom and smaller ones near the top. A tip is to use tape on the base instead of the step surface to protect your wood or carpet. Add small battery candles between the shapes for a warm glow at night. The whole staircase takes about an hour to decorate. Keep the shapes away from the walking path so nobody trips. In the morning, the silhouettes look just as cute in natural daylight. Swap a pumpkin for a ghost halfway up to keep the pattern playful.
19. Cardboard Black Cats
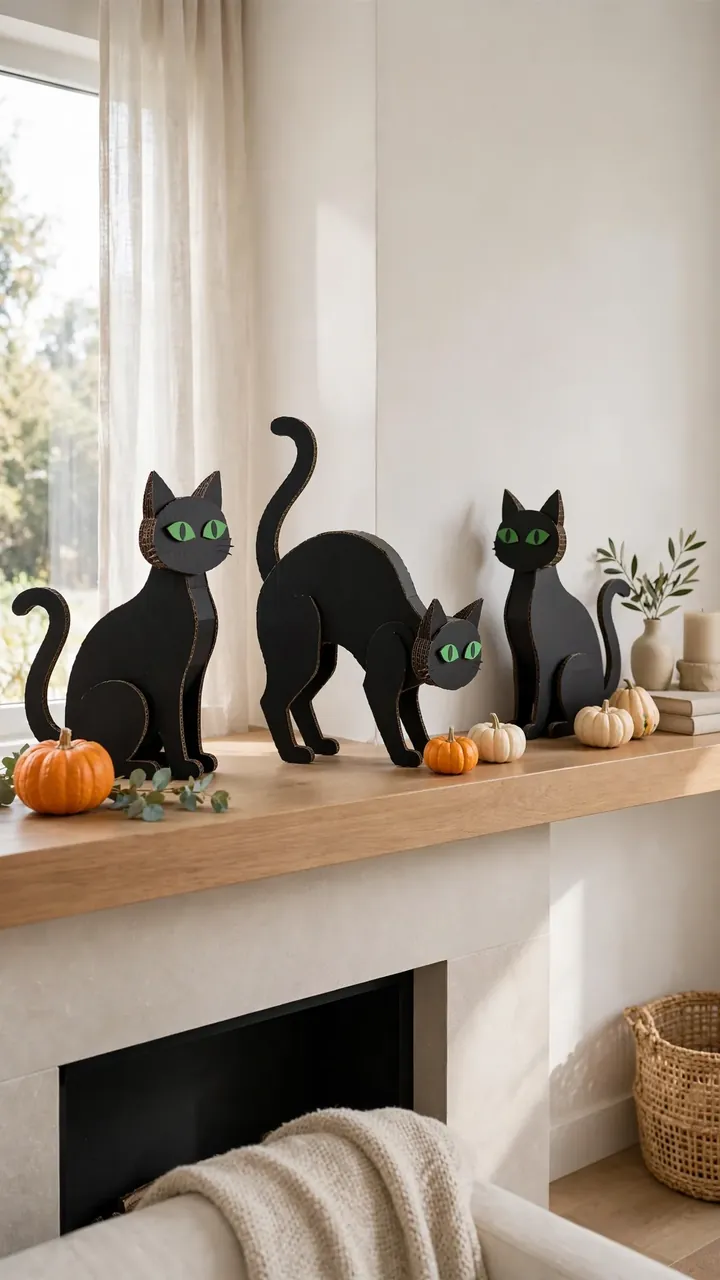
Cut black cat silhouettes from cardboard with arched backs, tall tails, and pointy ears, then paint them solid black. These spooky cardboard decor pieces look great on a mantel, a porch railing, or peeking from behind curtains. Draw the cat profile on cardboard, including the curved back and upright tail, and cut it out with a craft knife. Paint both sides black and add green or yellow paper eyes for a striking look. Glue a small base to the back so each cat stands upright. Make cats in three different poses, sitting, arching, and walking, for a natural group. A good tip is to lightly sand the cut edges so they look smooth. They store flat and last for years. Tuck one behind a curtain so it peeks out and surprises guests. Pair the cats with a small cardboard moon for a classic Halloween night scene on your shelf. A few scattered candy corn pieces around the base add a sweet finishing touch.
20. Creepy Castle Backdrop
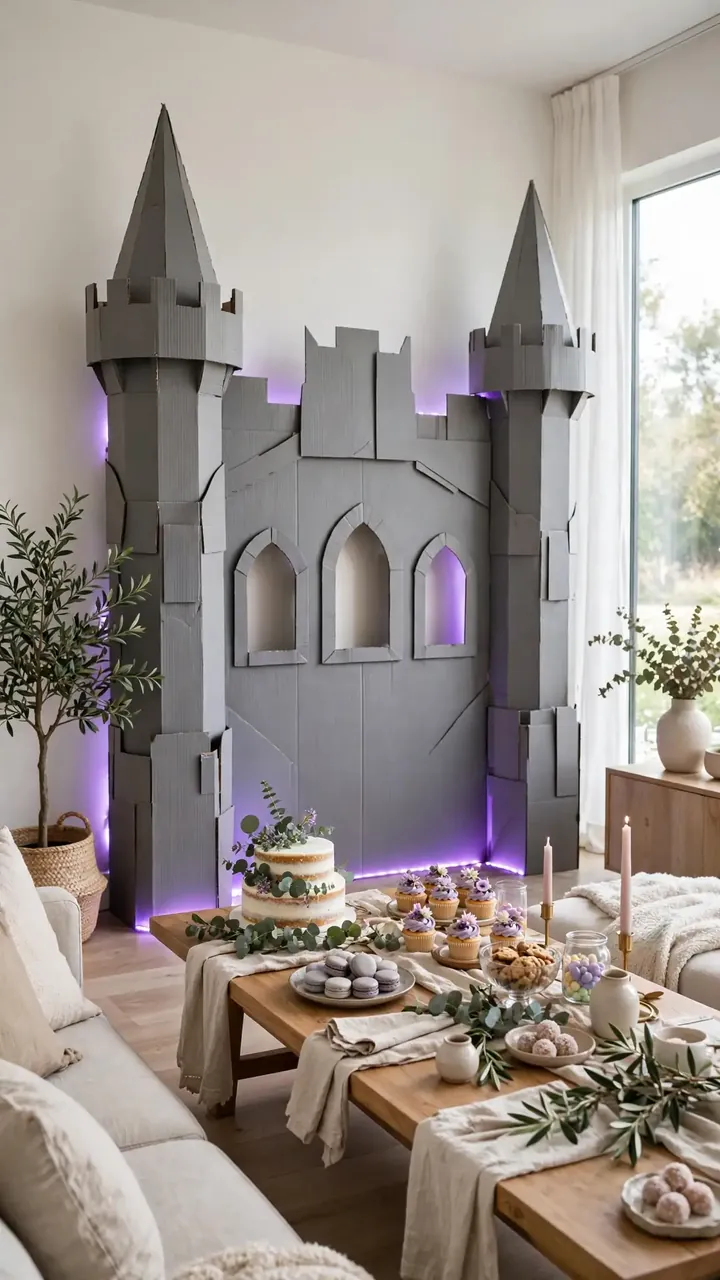
Build a large castle backdrop from taped together cardboard panels, with cut out towers, windows, and a big gate. This haunted house decoration is perfect behind a dessert table, a photo area, or a living room wall for a Halloween party. Tape three or four large boxes open into flat panels and join them side by side. Cut the top edge into battlements and tower shapes, then cut out arched windows. Paint the whole thing dark gray and sponge on black for a stone effect. Lean it against the wall so it stands safely. A tip is to keep it in two or three sections so it is easy to move and store. Add purple uplighting in front of it for a dramatic party look. Set a few cardboard bats flying above the castle to fill the empty wall space. Guests will love taking photos in front of it. When the party ends, the panels stack neatly in a closet until next year.
21. Cardboard Mummy Figures
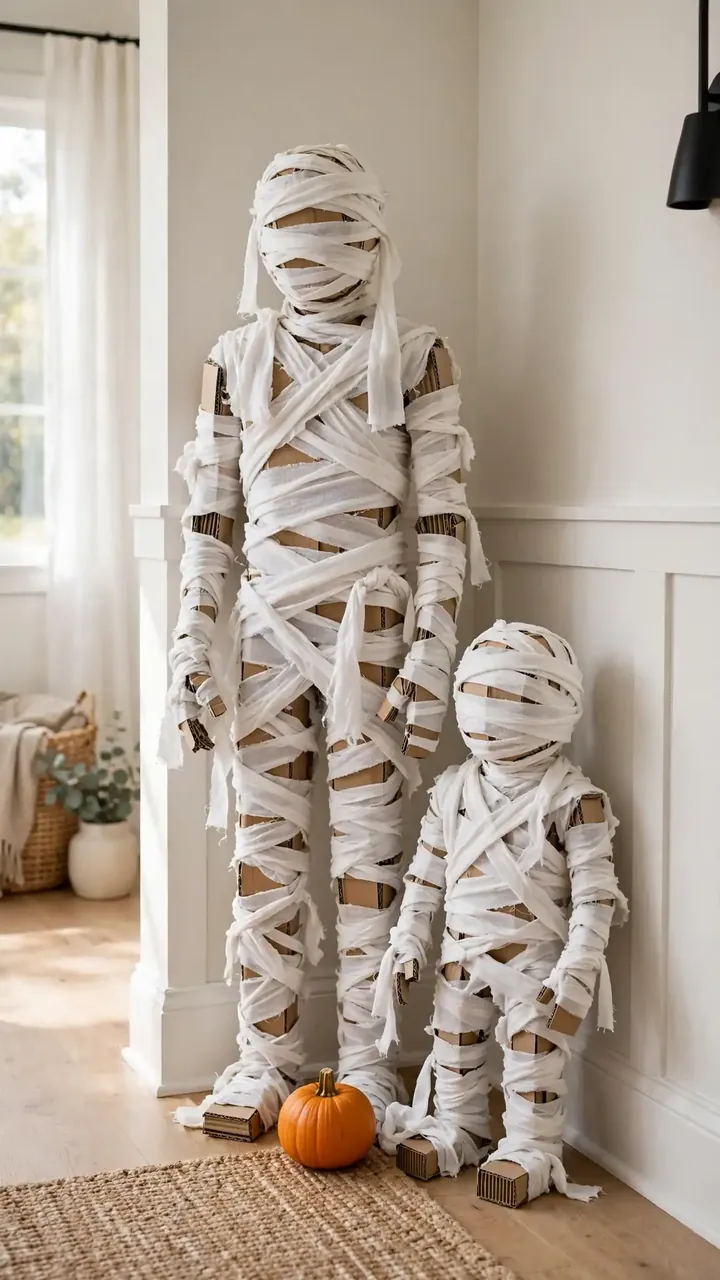
Wrap cardboard human shapes in strips of white paper or gauze to make standing mummy figures. These cardboard halloween crafts are fun in a hallway, a bedroom corner, or flanking the front door. Cut a simple body shape with a round head from large cardboard, then wrap it loosely with torn white fabric strips or paper towels, leaving gaps to show the cardboard beneath. Glue the ends down as you go. Draw two dark eyes on the face area for a spooky stare. Make one tall mummy and one short mummy for a fun pair. A practical tip is to use a glue stick for the wrapping so it stays light. Stand them in a corner with a small pumpkin at their feet. Lean the taller mummy slightly against the wall so it does not wobble. A dim lamp nearby makes their eyes look extra spooky at night. For a fun twist, give the small mummy a tiny cardboard pumpkin to hold.
22. Pumpkin Patch Sign
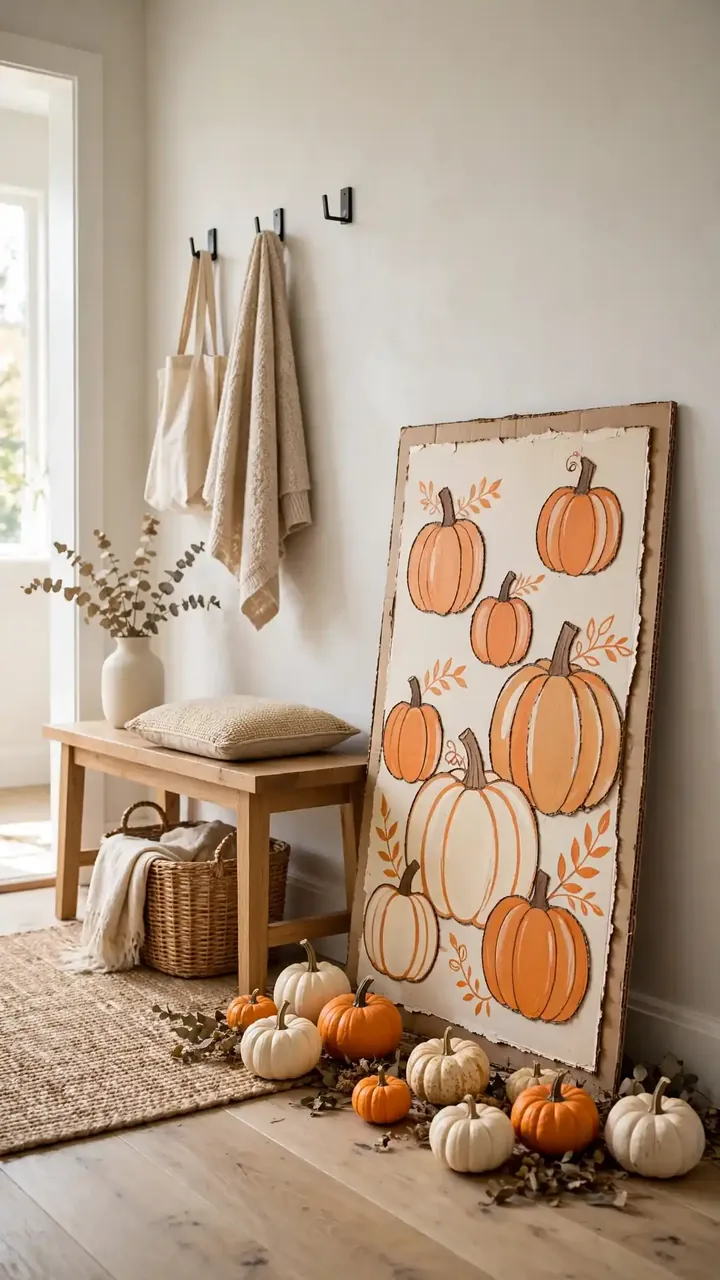
Cut a large sign shape from cardboard, paint it orange and brown, and letter it with words like Pumpkin Patch. This recycled cardboard craft is sweet on a porch, in an entryway, or leaning against a living room wall. Cut a rectangle with pointed ends like an old wooden sign, and paint the background a warm cream color. Paint a thick orange border and add small pumpkin drawings in the corners. Letter the words carefully with a dark brown marker, keeping the letters large and even. Glue two cardboard stakes to the back so it can stand in a planter or lean safely. A tip is to sketch the letters in pencil first. It gives your home a cozy farm stand feel. Hang a small wreath or a few dried corn husks beside the sign to complete the look. This sign also works nicely as a backdrop for fall family photos.
23. Cardboard Lantern Houses
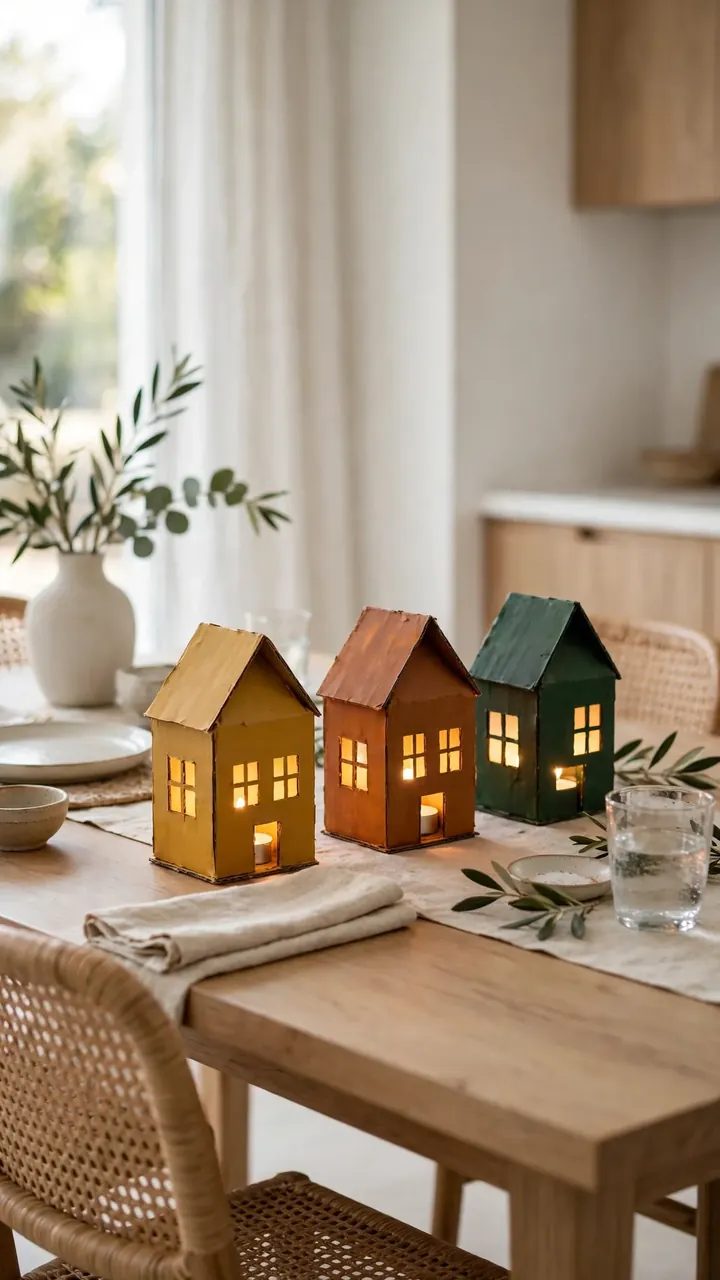
Make small house shaped lanterns from cardboard with cut out windows and doors, then light them from inside. These diy cardboard halloween decorations look magical lined up on a dining table or a bedroom windowsill. Cut four walls and a pointed roof from thin cardboard, tape them into a house shape, and cut out little windows on each wall. Paint the houses in fall colors like mustard, rust, and deep green. Place a battery tea light inside each one so the windows glow softly. A good tip is to cut the windows before assembling the house, since it is much easier. Make five or six in different sizes and group them close together like a tiny glowing street. Add a few bottle brush trees or tiny pumpkins between the houses for a finished village scene. They look just as pretty in a bedroom as on the dining table. Line them along a windowsill and they will glow softly every evening.
Frequently Asked Questions
What kind of cardboard works best for Halloween decorations?
Corrugated shipping boxes work best for large pieces like haunted houses and castle backdrops because they are stiff and hold their shape. Cereal boxes and other thin cardboard are better for small cutouts like bats and ghosts because they are easy to cut with scissors. Save a mix of both so you have the right thickness for each project. Always pick clean, dry boxes without grease stains.
How do I cut cardboard cleanly without tearing it?
Use a sharp box cutter or craft knife and always cut on a cutting mat or a thick piece of scrap cardboard. Score the line lightly first, then make a second deeper pass instead of forcing the blade through in one go. For curves, use sharp scissors and turn the cardboard rather than the scissors. Replace your blade often, since a dull blade is what causes most tearing.
What paint should I use on cardboard?
Acrylic craft paint is the best choice because it dries fast and covers well with two thin coats. Keep the coats thin so the cardboard does not get soggy or warp. For large pieces, a small foam roller gives smooth coverage quickly. Let each coat dry fully before adding the next, and paint in a ventilated room so everything dries evenly.
Can cardboard Halloween decorations go outside?
They can go on a covered porch, but they will not survive rain, so keep them dry. If you want to use them outdoors, place them under an overhang and bring them inside at night or when rain is coming. You can also brush on a clear craft sealer to add a little moisture resistance. For fully outdoor displays, it is safer to keep cardboard pieces inside and use store bought plastic outside.
How do I store cardboard decorations for next year?
Store them flat in a large box or slide them between pieces of clean cardboard to keep them from bending. Keep them in a dry closet or under a bed, away from damp basements or hot attics. Remove any battery lights before storing. Label the box so you can find everything easily next October, and check each piece for damage before putting it away.
Conclusion
Cardboard is one of the easiest materials for Halloween because it is free, light, and forgiving when you make a mistake. Pick two or three of these ideas to start with, and let the rest wait for next year. The best part is making them with family or friends on a quiet afternoon, with paint on your hands and a fun mess on the table. Your home will feel personal and festive, and you will have decorations with real memories attached to them.

Leave a Reply